
 Resources
 Campus Life
 Just for you


 My Canyons
  Canvas

Webhelp Making Your PDF Document Accessible
What should I do first?
If you don't quite know how to began, let's start here and we'll give you some helpful tips as well.
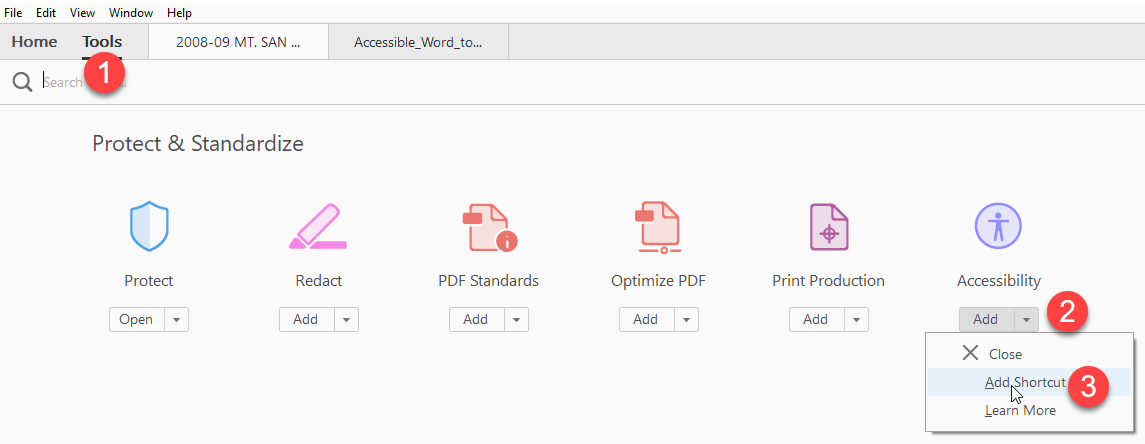
Setup: First, let's make sure your acrobat is setup correctly. If you don't have the accessibility tool on the right, then follow these steps below.
- Click the Tools menu
- Click the drop-down arrow beneath Accessibility
- Choose Add Shortcut
Now that that's done, there are 3 Main Steps you should follow at the beginning of making any PDF accessible.
Step 1: Autotag the document. Even when a document is already tagged, it's tagged improperly 9 times out of 10. Follow the steps below to Autotag your document
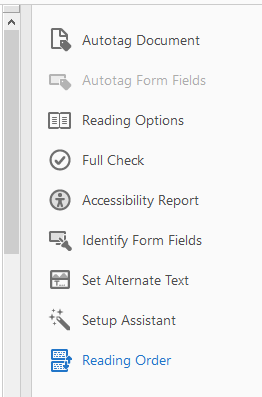
- Select Accessibility

- Select Autotag Document
- A panel on the left should open up showing you the recent tags placed on the document. No need read through these updates.
*Tip*: You should avoid retagging the document after the first time if you can. Retagging the document more than once would undo most accessibility progress made like fixing alt-text, headings, table headers, etc. There is no undo button in acrobat.
Step 2: Scan the PDF to see what errors are still present after Autotagging it. Follow the steps below to do so.
- Select Accessibility
- Click Full Check
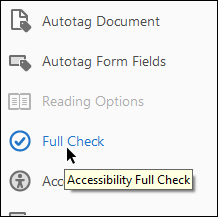
- Uncheck Create Accessibility Report

- Click Start Checking
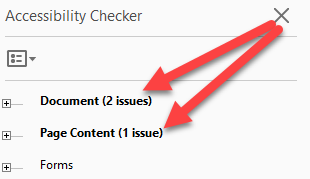
- A panel should appear on the left informing you of the errors on your document.
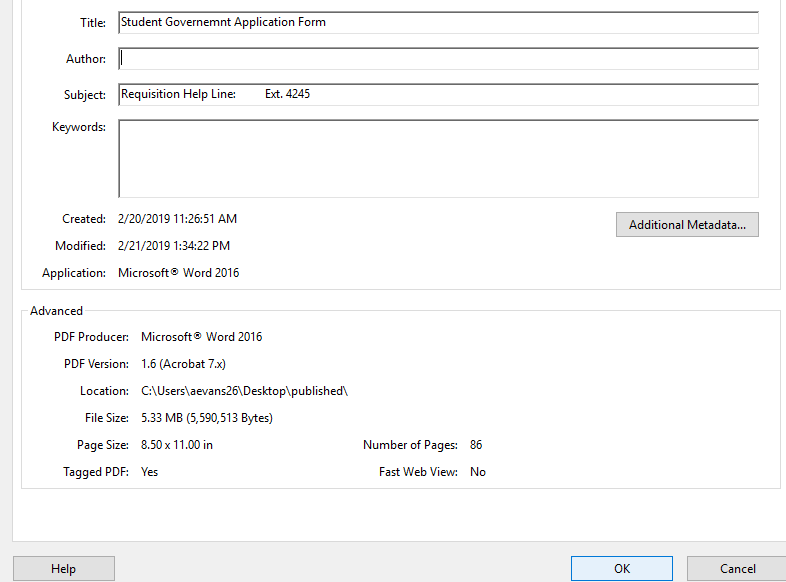
Step 3: Manually check the title ALWAYS. Even though Acrobat sometimes clears the error, it's normally still not sufficient. We'll throw in an example after step 3 if you'd like to see what we mean.
- Right click and choose Fix. If it prompts for a title then input one and you are good to go. BUT, If you are not prompted and the error clears, then continue the steps.
- Although the error is gone after selecting fix, the problem is still very much there.
- Go to file on the upper-left and select properties.
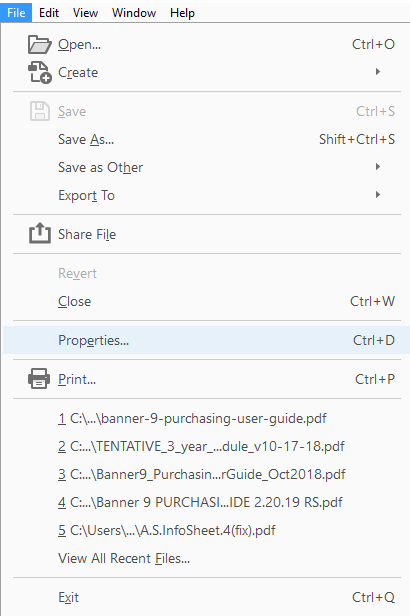
- Input a title there and click OK to finalize.
-
The reason we ask for a manual check in the file>properties is because sometimes there is a title, but it's a bad one. Here's one example below.

(This title is clearly incorrect on many levels)
Ok, while this title might be a little exaggerated in what you might see, we often times find titles like "MT" or even "2016-04-25 14:30" which aren't very good titles for a screen reader. There's been a few rare cases of good titles, but more often than not, you will have to input your own title regarding what the PDF is about.
There you have it, the first 3 steps in making your PDF accessible. From here, simply fix the errors present on your PDF after scanning it. An explanation on how to fix these errors can be found below in alphabetical order.
Accessibility Issues (A-Z) and Instructions on How to Fix Them
- Right click and choose fix
- Do not select any types to bookmark
- Click OK
Character Encoding happens because the PDF was created with unrecognizable characters, font, or both. Leaving this in place would mean the screen reader would not be able to read anything with a character encoding problem. In order to fix this error you must..
- Select the Edit PDF tool
- Retype the words/characters with this error using a different font
- Re-scan the document to clear the error
- Scroll through the document looking to see if color is used. Make sure light text is not used with a light background and/or dark text is not used on a dark background(a.k.a it's not too hard to read it right?).
- If there are no apparent color issues, right click and choose Pass
- Expand the error, right-click figure 1, and click fix

- The Set Alternate Text window is now open. Simply input a description of the highlighted image.
- Be sure not to say "Image of...". Just describe exactly what's there in 25 words or less.
- If the figure is just for decoration like a pencil icon or a little hat image, check the Decorative Figure box.
- Click the arrow to fix the next figure or select Save & Close to finish.
- Expand the tree
- Right click Element 1
- Click Show in Tags Panel
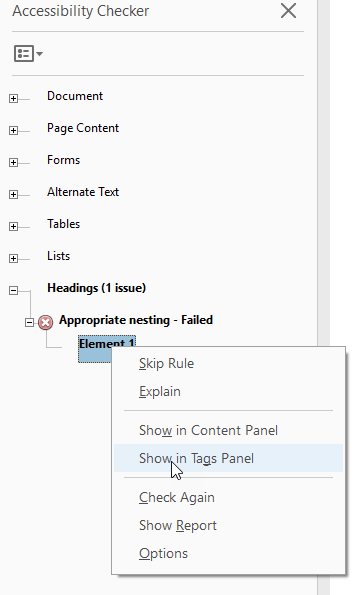
- Double Click the highlighted tag
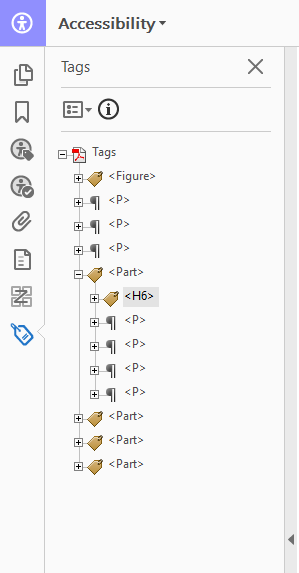
- Change it to the correct heading level (e.g., H1, H2, H3).Make sure the headers are in order and it's not going from <H1> to <H3> or starting off at <H2> rather than <H1>.
- Save
- Rescan the document
- Right click the error
- Select Fix
Note: If this is a PDF made from an image, this will attempt to recognize characters in the image. This is NOT recommended. The PDF shoudl be reconverted from the original source, not from an image.
- Click Accessibility

- After clicking on accessibility click on Reading Order in the new menu.
- After clicking the reading order button the touch up menu will display. Click Show Order Panel button to display order panel.
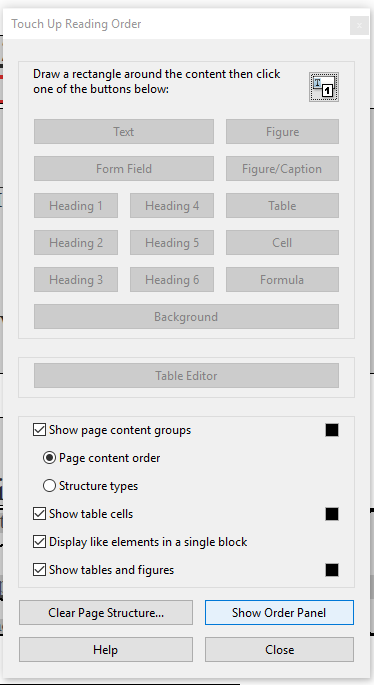
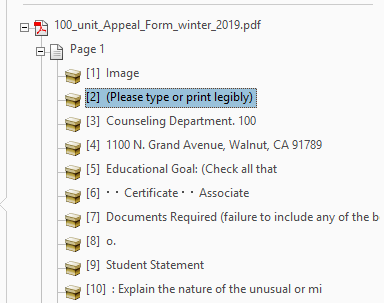
- The document will be displayed with the reading order and reading order panel.
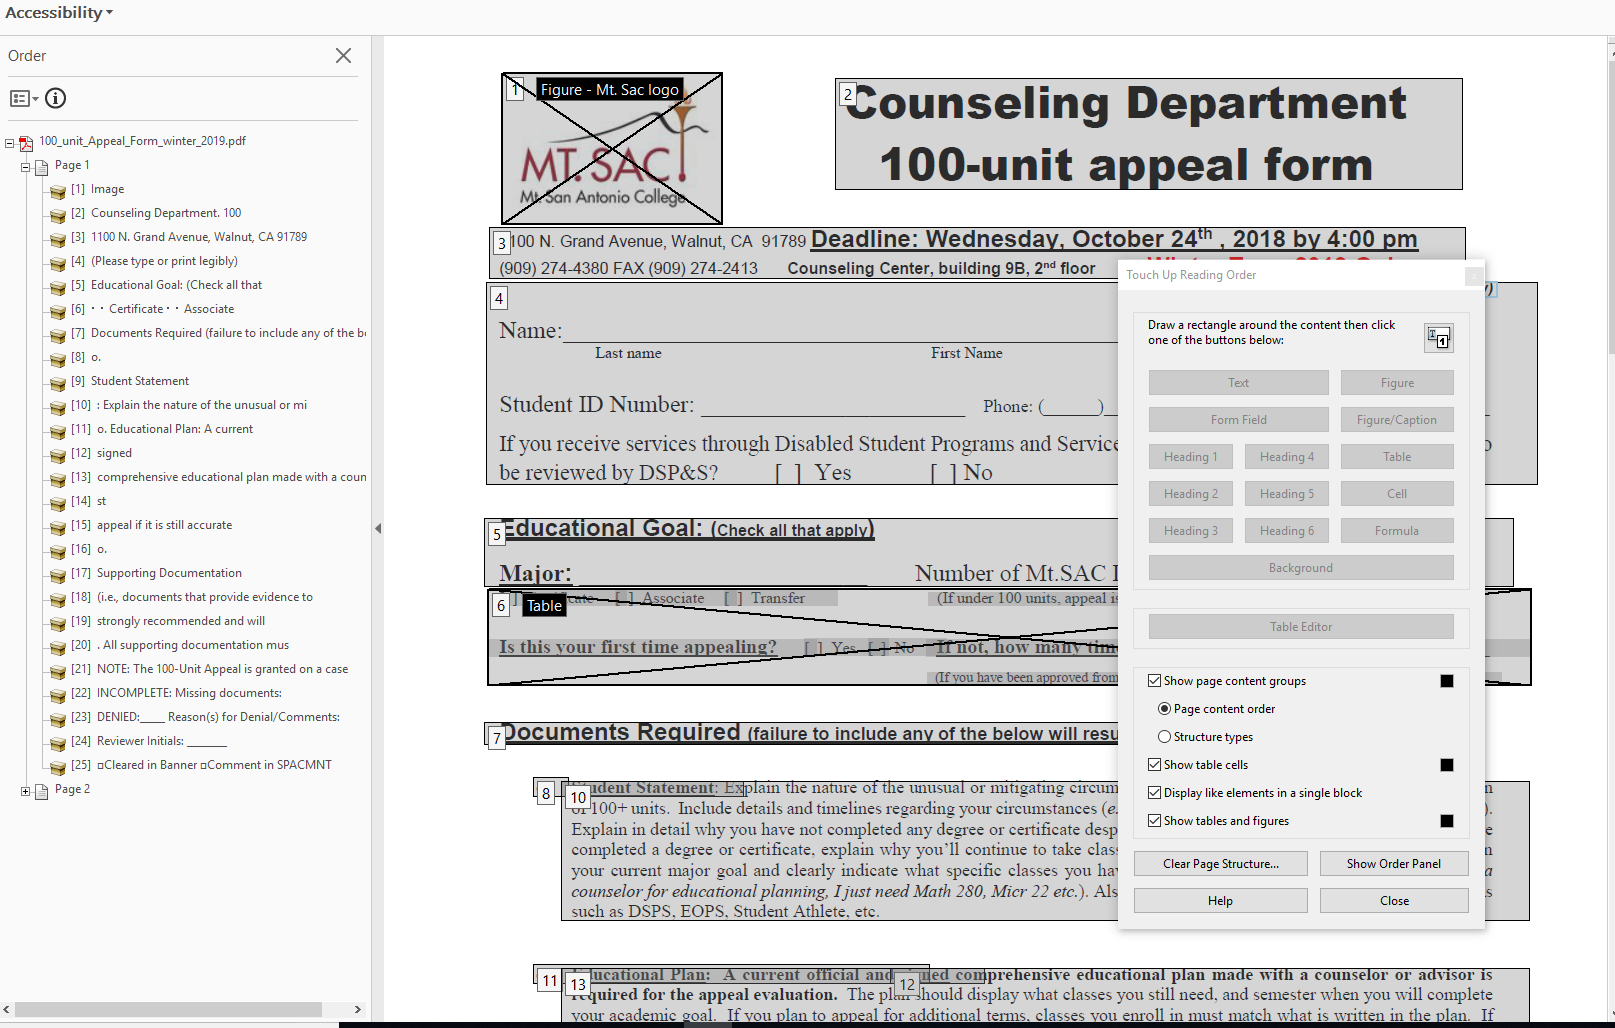
- Manually check to make sure the items are listed in the same order you would read the document. If not simply drag them into the correct order.
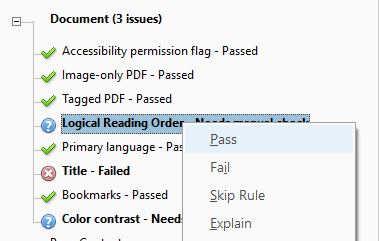
- After making sure the reading order follows a logical reading structure click the accessibility checker button.
- Expand the Document issue tree and right click on Logical Reading Order. Click pass on the sub-menu that pops up.
This error may occur after fixing alternate text and selecting the Decorative Figure box.
- Open the Reading Order Panel
- Select figure 1 to highlight it on your document.
- Right click the highlighted error and Delete Selected Item Structure.
- Re-scan the document to get rid of the error.
- Right click and choose Fix
- Make sure the primary language used in the pdf appears in the drop-down and click OK
Note: If Accessibility does not appear in your sidebar, you will have to add it for the first time.
- Click the Tools menu
- Click the drop-down arrow beneath Accessibility
- Choose Add Shortcut
- Right click and choose Fix
Two Options to Fix Table Headers (option 2 is recommended.)
Option 1
- If it is not a table, right click the table and choose Delete Tag. Run Full Check again
- If it is a table:
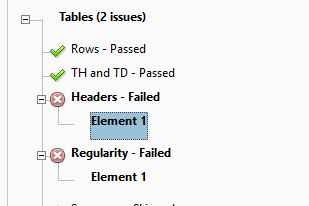
- Expand the Header- Failed error in the left navigation bar
- Right click Elements 1 and choose the Show in Tags Panel option
- Expand the Table tag
- Expand the <TR> tag
- Change <TD>s in the <TR> to <TH>
Option 2
- Click on Tables tree to expand it. Highlight the Element you want to fix. It will highlight the table and redirect you to the page with the table error.

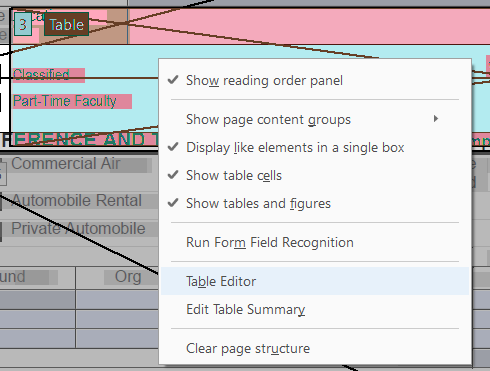
- Click Reading Order to show the structure blocks on the page
- Right click on the table that you're trying to fix. A sub-menu will appear. Click Table Editor on the sub-menu.
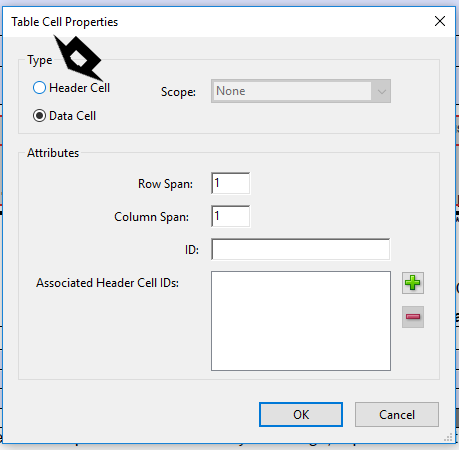
- After right clicking table editor the table will show the table data cell structures. Right click the data cells that should be table headers(normally the very top square cells). Click Table Cell Properties.

- A Table Cell Properties menu should appear where you will change the property type to Header Cell and click OK to finish. Do this to all data cells that should be header cells.
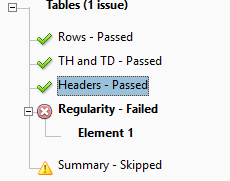
- Re-scan the document. The table header issue should be fixed.
Option 1
- Ensure your Accessibility Tools are open on the right side of your Adobe Acrobat.
- Next, Autotag Document
- Re-scan the document again and the error should be gone.
Option 2 (if option 1 doesn't work)
- Right click Element 1 and select show in tags panel.
- Expand each and every row (<TR>) of the highlighted table.
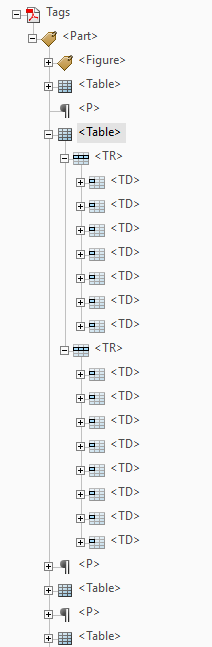
(Notice in the image above, the first table row (The <TR>) has 7 table data cells (The <TD>'s), while the second has 8. Your error is happening because one or more of your <TR>'s has a different number of <TD>'s. - Now you have to count how many <TD>'s are in each <TR> within your pdf.
- Once you've discovered the Row that needs more or less <TD>'s, right-click inside the row and select New Tag...
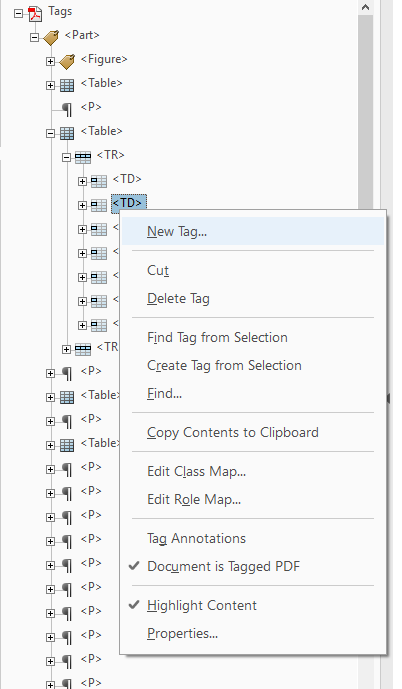
- Chose Table Data Cell type and select OK without inputting a title.
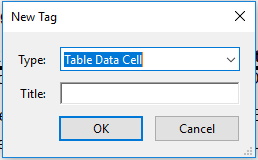
- A new <TD> tag should appear after the last step. Now recheck the document and your error should be gone.
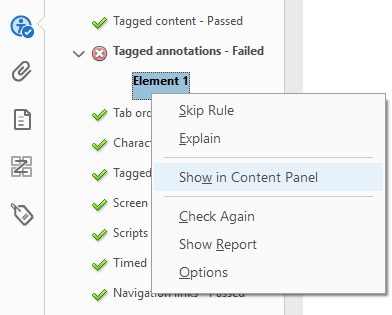
- Right-click element 1 and Show in Content Panel.
- Next, right-click the highlighted content and select Find.
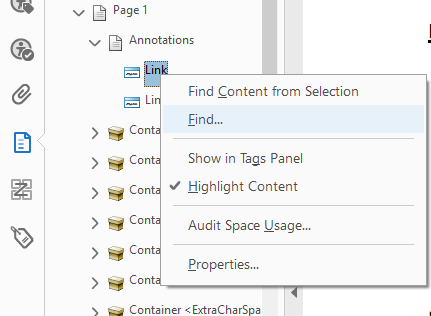
- Then, you have to find the type of untagged content you're looking for. In the case below, it's a link, so we're going to search for unmarked links. Also, select search document rather than search page, unless you'd like to do this one page at a time.

- Finally, a new tag box will appear, simply put in the tag matching the content. In our case it's a link so we'll use the Link tag. If it were text instead for example, we would be using the Paragraph tag.
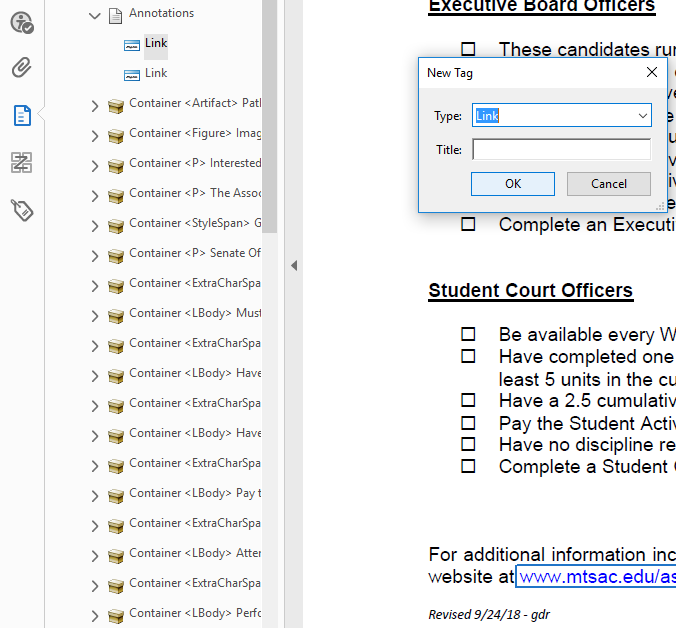
- Leave the title section empty and hit OK.
- Tag any other elements it automatically brings up and Re-scan the document to clear the error.
- Right click and choose fix
- Re-scan the document and the error should be gone
WARNING:(Ensure you follow all the steps of for this error)
- Right click and choose Fix. If it prompts for a title then input one and you are good to go. If you are not prompted and the error clears, then continue the steps.
- Although the error is gone after selecting fix, the problem is still very much there.
- Go to file on the upper-left and select properties.
- Input a title there and click OK to finalize.